Table of Contents
- Why the ADS-B Installation Timeline Matters for Your Aircraft
- FAA ADS-B Compliance Requirements: What Your Aircraft Must Meet
- Phase 1: Pre-Installation Assessment and Equipment Selection
- Phase 2: The Installation Process in the Avionics Shop
- Aircraft Avionics Installation Downtime: How Long Your Jet Is Grounded
- ADS-B Out Flight Test Procedures: The Final Verification
- How to Prepare Your Aircraft for a Smoother Installation
- Conclusion: Plan Your ADS-B Installation Timeline With Confidence
- Frequently Asked Questions
Last Updated: September 9, 2026
Why the ADS-B Installation Timeline Matters for Your Aircraft
Understanding the ADS-B installation timeline is the difference between a scheduled maintenance event and an unexpected grounding that disrupts your travel plans. An ADS-B installation timeline is the structured sequence of assessment, hardware installation, testing, and certification that brings your aircraft into compliance with the FAA's automatic dependent surveillance-broadcast mandate. At 305 Sky, we've guided owners of Challengers, Citations, King Airs, and Gulfstreams through this process in Fort Lauderdale, and the most common surprise is always the same: the project takes longer than the physical installation itself.
Most owners budget for the transponder and the labor, but overlook the pre-installation assessment, the flight testing, and the paperwork that follows. The full sequence typically spans one to two weeks of shop time, depending on your aircraft's existing avionics configuration. Below, we'll walk through each phase so you know exactly what happens, what questions to ask, and how to keep your jet flying on schedule.
FAA ADS-B Compliance Requirements: What Your Aircraft Must Meet
The regulatory foundation for this entire timeline is the FAA's mandate requiring ADS-B Out in controlled airspace where a transponder is required today. Under FAA's ADS-B regulations, aircraft operating in these areas, including the Mode C Veil around major airports, must broadcast their GPS location, altitude, ground speed, and aircraft identification to ground stations and other equipped aircraft.
Compliance hinges on several hardware and performance criteria. Your installation must meet the FAA's performance requirements for position accuracy, velocity, and signal broadcast integrity. The equipment must be certified appropriately, and the system must pass a flight test that verifies the transmitted data matches reality. Many owners also choose to add ADS-B In capabilities, which receive traffic and weather data, though this is not required for the mandate. Understanding these requirements early shapes the equipment selection and the overall timeline.
Phase 1: Pre-Installation Assessment and Equipment Selection
The first phase begins with a thorough assessment of your current avionics. A technician will review your existing transponder, GPS navigator, and antenna configuration to determine what upgrades are necessary. Older GPS units may not meet the required position accuracy standards, which means a new GPS source or a compatible upgrade is part of the project.
Equipment selection follows the assessment. The choice between a new transponder with built-in ADS-B Out and a standalone ADS-B unit depends on your panel layout and your long-term avionics plans. Software compatibility matters here: the new equipment must communicate correctly with your existing displays and navigation systems. A common mistake is assuming any certified unit will work with any panel. The avionics shop should confirm compatibility before ordering hardware, since returns on specialized aviation equipment are rarely straightforward. This planning phase is where the ADS-B installation timeline is truly defined.
Phase 2: The Installation Process in the Avionics Shop
This is where the abstract planning becomes physical work on your Challenger, Citation, King Air, or Gulfstream. Unlike the vague 'remove and replace' summary you'll find on national sites, a realistic timeline breaks this phase into distinct mechanical sub-tasks, each with its own time cost. Here is the actual sequence our technicians follow on the hangar floor in Fort Lauderdale, which is the core of your total downtime.
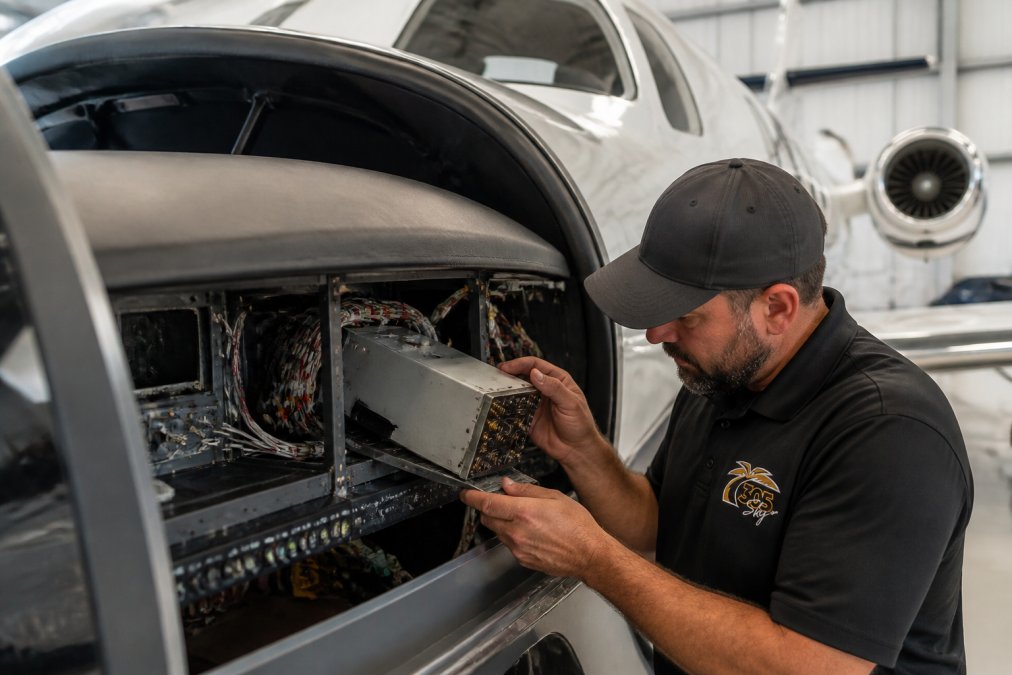
Day 1-2: Tear-Down and Access The first hours are not about the new transponder; they are about getting to it. For a typical business jet, this means removing the copilot's lower instrument panel, disconnecting the existing transponder's rack, and, on many Hawker and Beechjet models, unbolting the forward avionics bay access plate. If your aircraft has a remote-mounted transponder in the tail cone, add a day for the crew to pull the aft equipment bay panels. The technician documents every disconnected connector with photos and labels, a step that prevents costly re-work during re-assembly.
Day 3-4: Antenna and Wiring Rework The most common hidden variable is the antenna. If your existing transponder antenna is a single-band unit, it must be swapped for a dual-band ADS-B antenna. This is not a simple unscrew-and-rescrew job. The technician must:
- Remove the antenna from the belly or top of the fuselage.
- Inspect the mounting plate for corrosion or hairline cracks (common on older Learjets).
- Install the new antenna with fresh sealant and torque it to the manufacturer's specification.
- Run a new coaxial cable if the existing run is damaged or if the new transponder requires a different connector type.
Simultaneously, the wiring harness for the new unit is fabricated. On a modern Gulfstream with an integrated avionics bus, this might be a simple plug-and-play connector. On a legacy Citation with a point-to-point wiring loom, the technician must pin out each wire to the new transponder's back shell, a process that is painstaking and unforgiving of errors.
Day 5-6: Unit Mounting and Configuration The new transponder is racked, and the wiring is connected. This is when the software configuration begins. The unit is powered up, and the technician loads the aircraft-specific configuration file. This includes setting the ICAO 24-bit address, the aircraft call sign, and the GPS source selection. If the installation includes a new GPS navigator, this is where the technician must ensure the position source is broadcasting the correct integrity flags to the transponder. A mismatch here is a leading cause of flight test failures.
Day 7: Functional Ground Testing Before the aircraft leaves the hangar, the system is tested on the ground. The technician uses a ramp tester to simulate a ground station interrogation. This verifies that the transponder is replying with the correct pressure altitude, flight ID, and GPS position. This is the first gate where installation errors surface. If the ground test shows a 'Fail' for GPS integrity, the technician must trace the data bus wiring, a process that can add a full day to the timeline if a pin was seated incorrectly.
:::tip Local Fort Lauderdale Logistics Unlike generic national guides, a South Florida installation is subject to specific environmental factors. The salt-air environment in hangars near the coast often accelerates corrosion on antenna connections, making the antenna inspection step non-negotiable. Additionally, scheduling your installation during the summer thunderstorm season can delay the required flight test, as the test pattern cannot be flown in convective weather. Plan for a weather buffer if you are scheduling between June and September.
Aircraft Avionics Installation Downtime: How Long Your Jet Is Grounded
The honest answer to 'how long' is not a single number, it is a function of your aircraft's configuration and the shop's schedule. While national averages cite 'one to two weeks,' that range is nearly useless for planning a trip. Here is a realistic, phase-by-phase breakdown of where that time actually goes, based on typical installations across the aircraft types we service.
The Realistic Schedule Breakdown:
| Phase | Typical Duration | Variables That Extend It |
|---|---|---|
| Pre-Installation Assessment & Parts Ordering | 3-5 business days (can be done while aircraft is flying) | Backordered transponder units; obsolete GPS antennas requiring fabrication of adapter plates. |
| Physical Installation (Tear-down, Wiring, Mounting) | 4-6 business days | Extensive rewiring on legacy Hawker 800s; corrosion repair on antenna mounting points. |
| Ground Testing & Configuration | 1-2 business days | Software configuration mismatches between the transponder and the flight management system. |
| FAA Flight Test & Documentation | 1-2 business days | Weather delays in South Florida during afternoon thunderstorm season; ATC traffic congestion at Fort Lauderdale Executive Airport (FXE). |
| Total Shop Downtime | 6-10 business days | This is the 'worst case' you should plan for. |
The Pre-Installation Checklist (How to Shave Days Off the Schedule)
The single biggest factor in reducing downtime is what you do before the aircraft arrives at the hangar. Owners who show up with a complete documentation package save their shop a day of research. Before you drop off your jet at our Fort Lauderdale facility, ensure you have:
- Current Weight & Balance Data: Required for the flight test paperwork.
- Avionics Logs (Past 3 Years): Specifically, any 337 forms for previous transponder or GPS installations. This tells the technician what is actually wired into the panel versus what is on the original spec sheet.
- Aircraft Flight Manual Supplements: For the specific transponder model being installed, if available.
- Confirmation of Your GPS Source: Know the exact model and software version of your current GPS navigator. If it is a legacy unit like a Honeywell KLN-900, it will likely not be TSO-C166b compliant, and you will need a new GPS source, adding 2-3 days to the physical installation timeline (faa.gov).
AOG and Emergency Scheduling
If an unexpected grounding forces an urgent ADS-B installation, the timeline compresses. A shop with 24/7 AOG capability, like ours, can dedicate a team to a 'remove-and-replace' scenario, potentially completing the physical installation in 3 days instead of 5. However, the flight test still requires a weather window and ATC coordination, which is outside the shop's control. For planned work, booking your installation during a known slow period for your flying schedule is the smartest way to manage downtime. Planning for the worst case, two full weeks, means you are never caught off guard.
ADS-B Out Flight Test Procedures: The Final Verification
Installation is not complete until the system proves itself in the air. ADS-B Out flight test procedures verify that the installed equipment broadcasts accurate data that ATC and other aircraft can receive. The aircraft must fly a specific pattern while ground stations validate the transmitted GPS location, altitude, and ground speed against the known track.
The test also checks for NPE, or Non-Performing Equipment, which the FAA monitors (faa.gov). An aircraft that fails to broadcast correctly can be flagged, creating compliance issues down the line. The flight test is the moment where installation errors surface, which is why the ground testing during installation matters so much. After a successful flight test, the technician completes the required documentation and logbook entries, and your aircraft is fully compliant. This verification phase is the final gate in the ADS-B installation timeline before you resume normal operations.
How to Prepare Your Aircraft for a Smoother Installation
A little preparation on your end can shorten the timeline and reduce surprises. Start by gathering your aircraft's maintenance logs and any existing avionics documentation. The shop will need these to confirm the current configuration and to plan the integration. Clear the aircraft of personal items, since the interior panels and seats near the avionics bay may need to be opened or removed.
Communicate your flying schedule clearly. If you need the aircraft back by a specific date for a planned trip, say so during the initial consultation. This allows the shop to sequence the work appropriately. Also, confirm whether the shop handles the entire scope, from the assessment through the flight test, or whether any steps are farmed out. A single point of responsibility simplifies coordination and keeps your aircraft avionics installation downtime to a minimum. Many owners also schedule other routine maintenance, such as inspections, during the same visit to avoid a second grounding.
Conclusion: Plan Your ADS-B Installation Timeline With Confidence
An ADS-B installation timeline does not have to be a source of stress. When you understand the phases, the realistic downtime, and the testing requirements, you can schedule the work around your operations and avoid last-minute scrambles. The key is to start with a thorough assessment, choose compatible equipment, and work with a shop that handles the entire process transparently.
At 305 Sky, our team brings over 55 years of combined aviation experience to every installation, backed by 24/7 AOG emergency support and a transparent, family-oriented approach. From routine maintenance to bespoke avionics upgrades for your Challenger, Citation, King Air, or Gulfstream, we keep your aircraft airworthy and compliant across our South Florida facilities. Request a quote today and get your ADS-B installation scheduled with confidence.
Frequently Asked Questions
What is the typical downtime for an ADS-B Out installation?
Most ADS-B Out installations take 3 to 7 business days depending on your aircraft type and the complexity of the upgrade. A simple transponder swap on a light jet may be done in 2 to 3 days, while a full panel integration on a larger Gulfstream or Falcon can take a week or more. Schedule your visit with the avionics shop in advance and ask for a written timeline estimate before you commit to the work.
Do I need a flight test after my ADS-B installation is complete?
Yes. The FAA requires an ADS-B Out flight test to verify your equipment broadcasts accurate position, velocity, and identification data. This is not optional. The test is performed in controlled airspace where ATC can validate your signal, and you will need the flight test report for your records. Your avionics shop will coordinate the flight test and handle the paperwork before returning your aircraft.
What documentation is required after an ADS-B installation?
Your avionics shop must provide a completed FAA Form 337, a weight and balance update if needed, and an ADS-B flight test report. Your transponder must also have its software updated to meet the current technical standard order. Keep copies of all paperwork in your aircraft logbook. A certified avionics shop will handle the FAA filing requirements as part of the installation service.
How do I prepare my aircraft for an avionics shop visit in Fort Lauderdale?
Remove personal items, loose gear, and any valuables from the cabin and cockpit before drop-off. Gather your aircraft logs, especially records of prior transponder or navigation equipment work. Let the avionics shop know about any squawks or intermittent issues you have noticed with your current equipment. Having your documentation organized speeds up the pre-installation assessment and helps the team start work on time.